Connecting Devolutions Remote Desktop Manager to KeyHub
In this guide you will be taken through the steps to create an OIDC application in KeyHub. Create a credential entry linked to KeyHub in RDM.
In KeyHub
Step 1
-
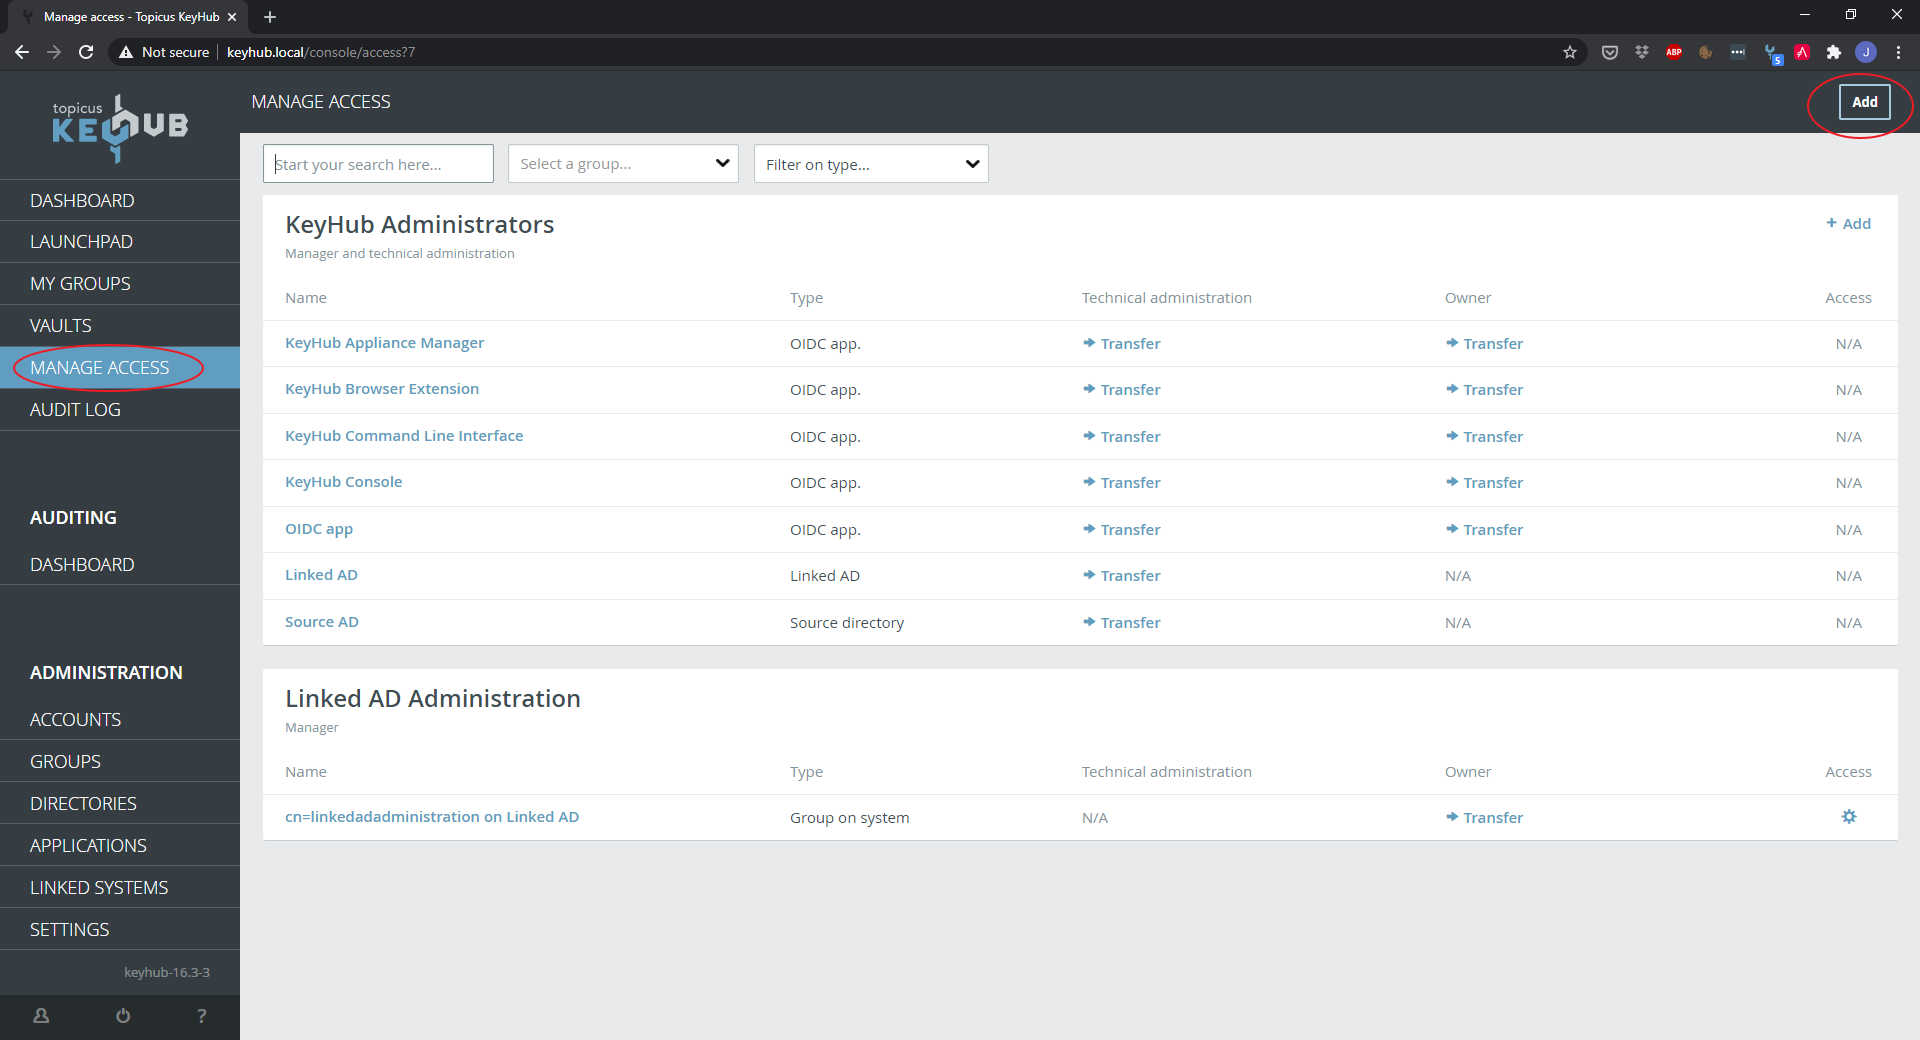
Click MANAGE ACCESS.
Step 2
-
Click Add.
-
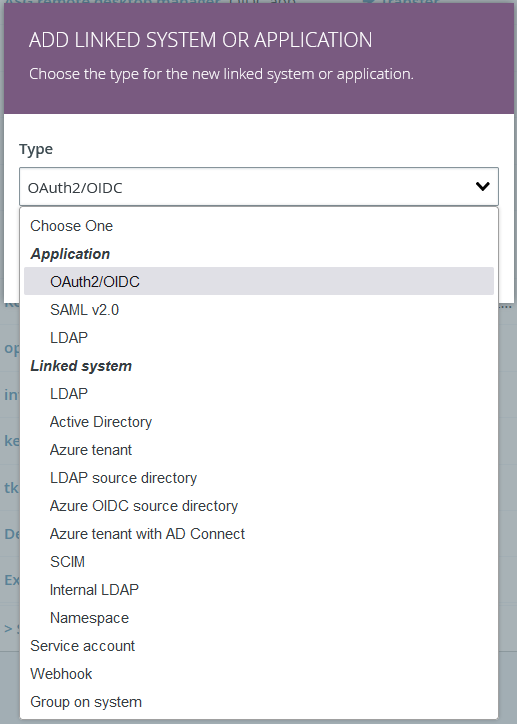
Choose Type: OAuth2/OIDC.
-
Click NEXT.
Step 3
-
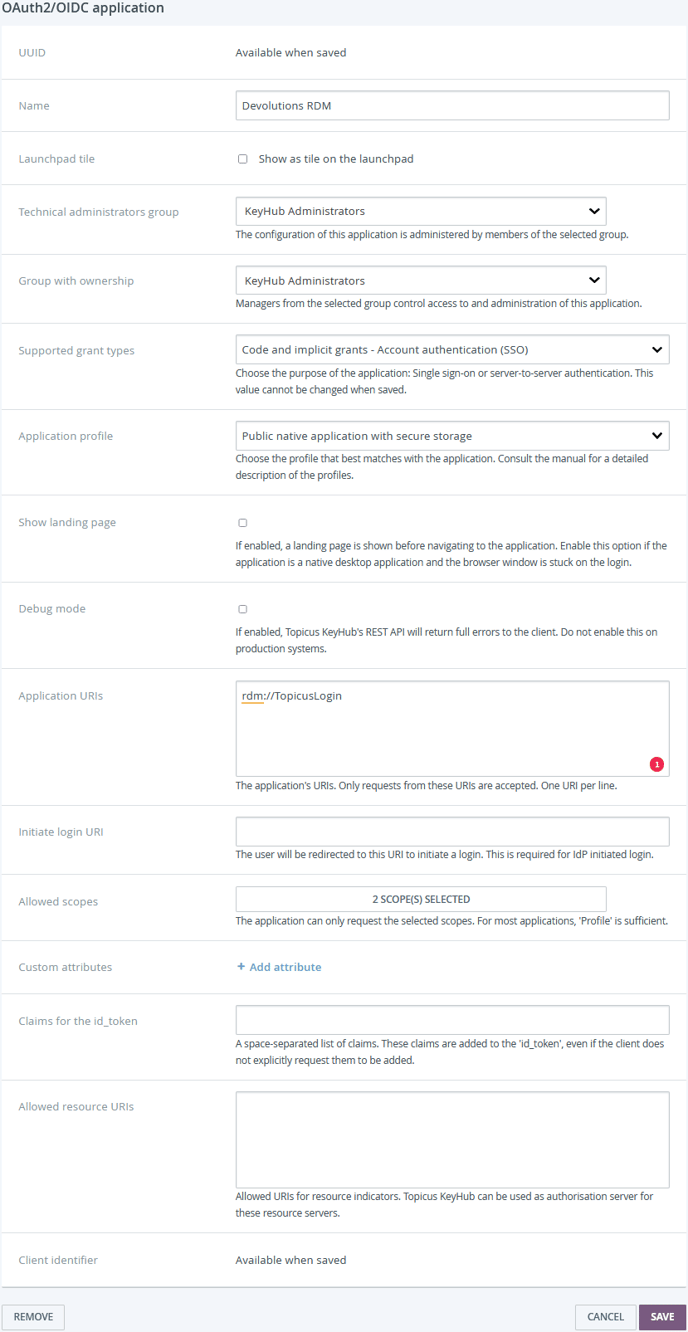
Choose a name.
-
Select your Technical administrators group.
-
Select the group with ownership.
-
Select the following application profile: `Public native application with secure storage`
-
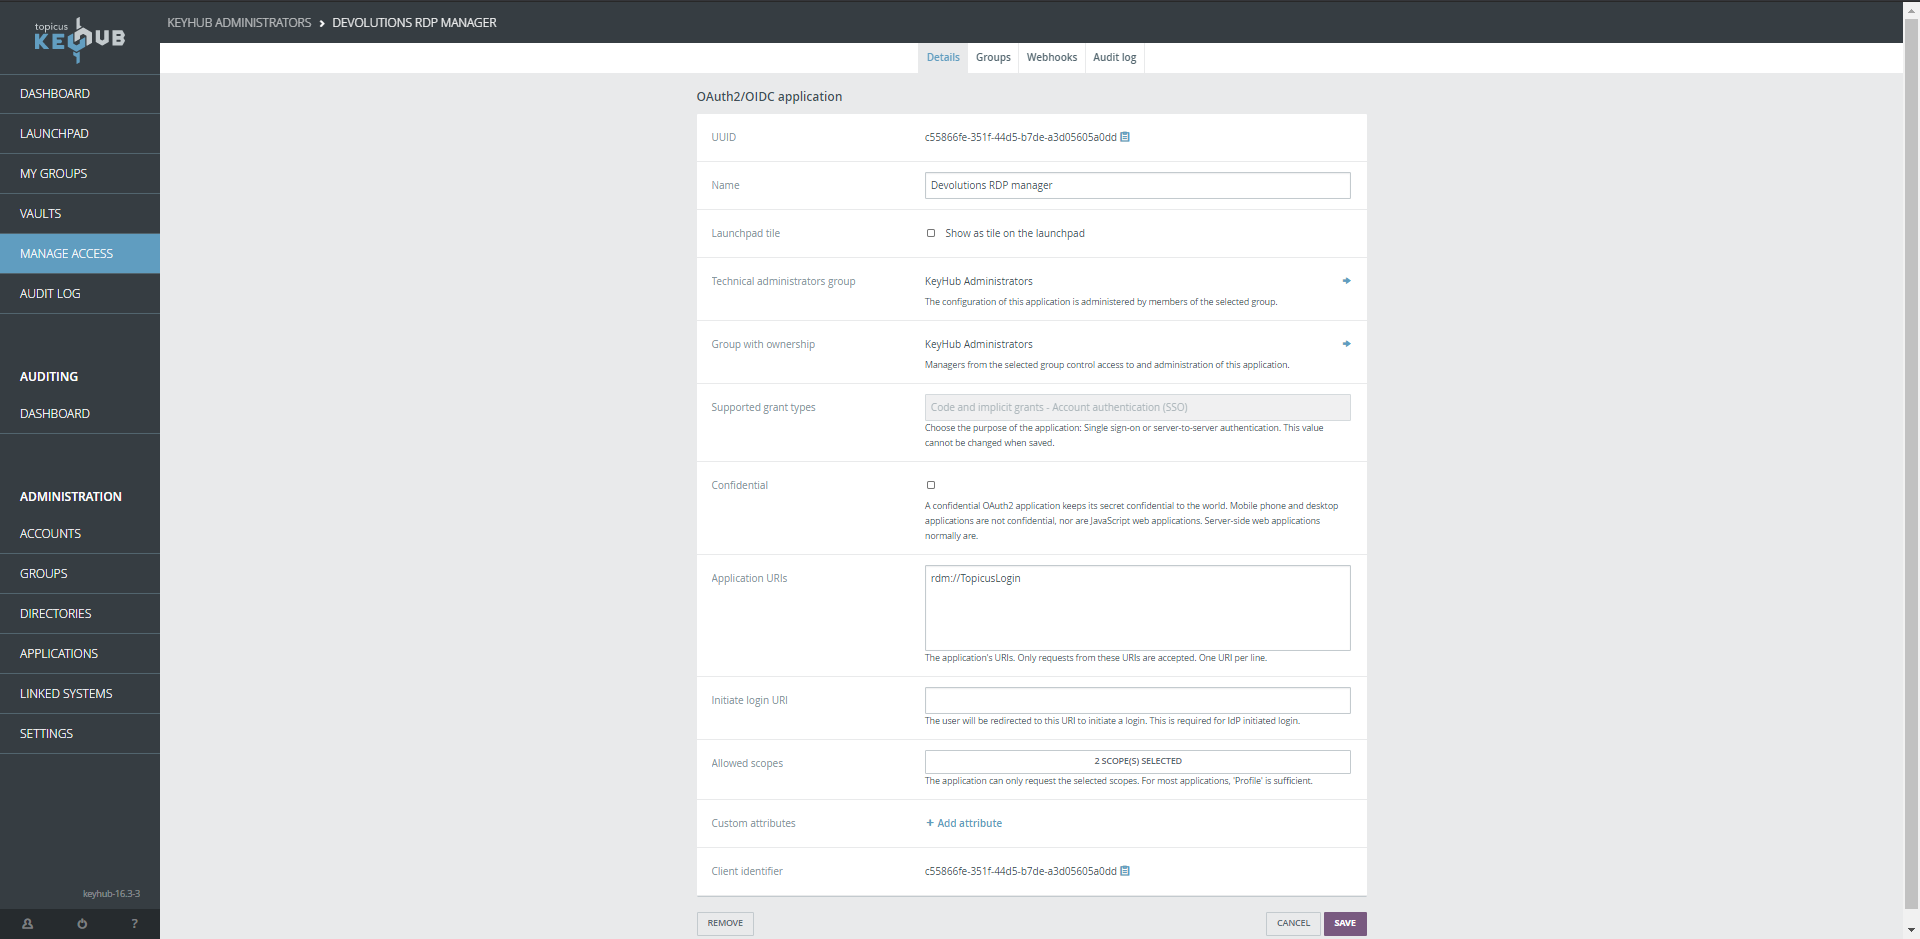
Fill in the application URI (this can be found in the create credential window in RDM).
-
Select Allowed scopes: `Profile` and `Access your vaults`.
-
Click SAVE.
Step 4
-
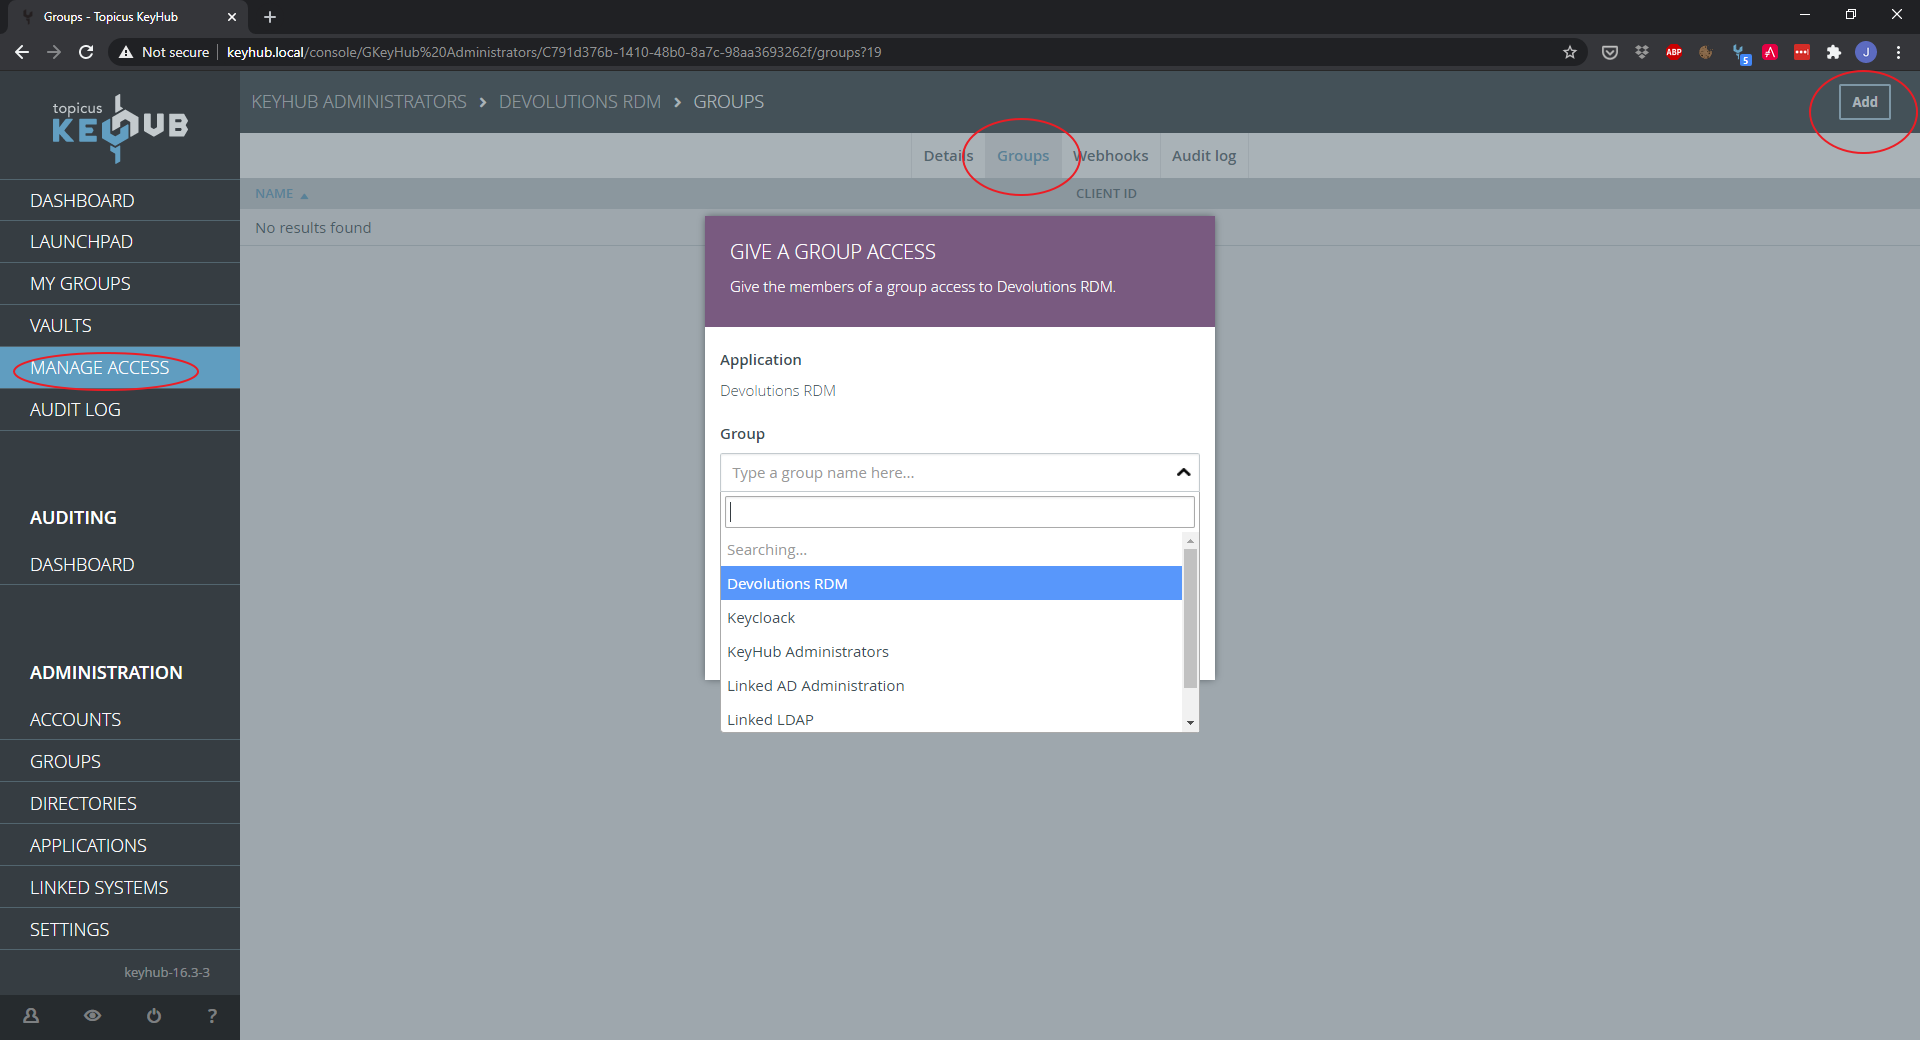
Open your newly made OIDC application.
-
Click on Groups.
-
Click ADD.
-
Select the group you want.
-
Click SEND.
Step 5
-
Done. Your OIDC Application is ready for use.
In Devolutions RDM
Step 1
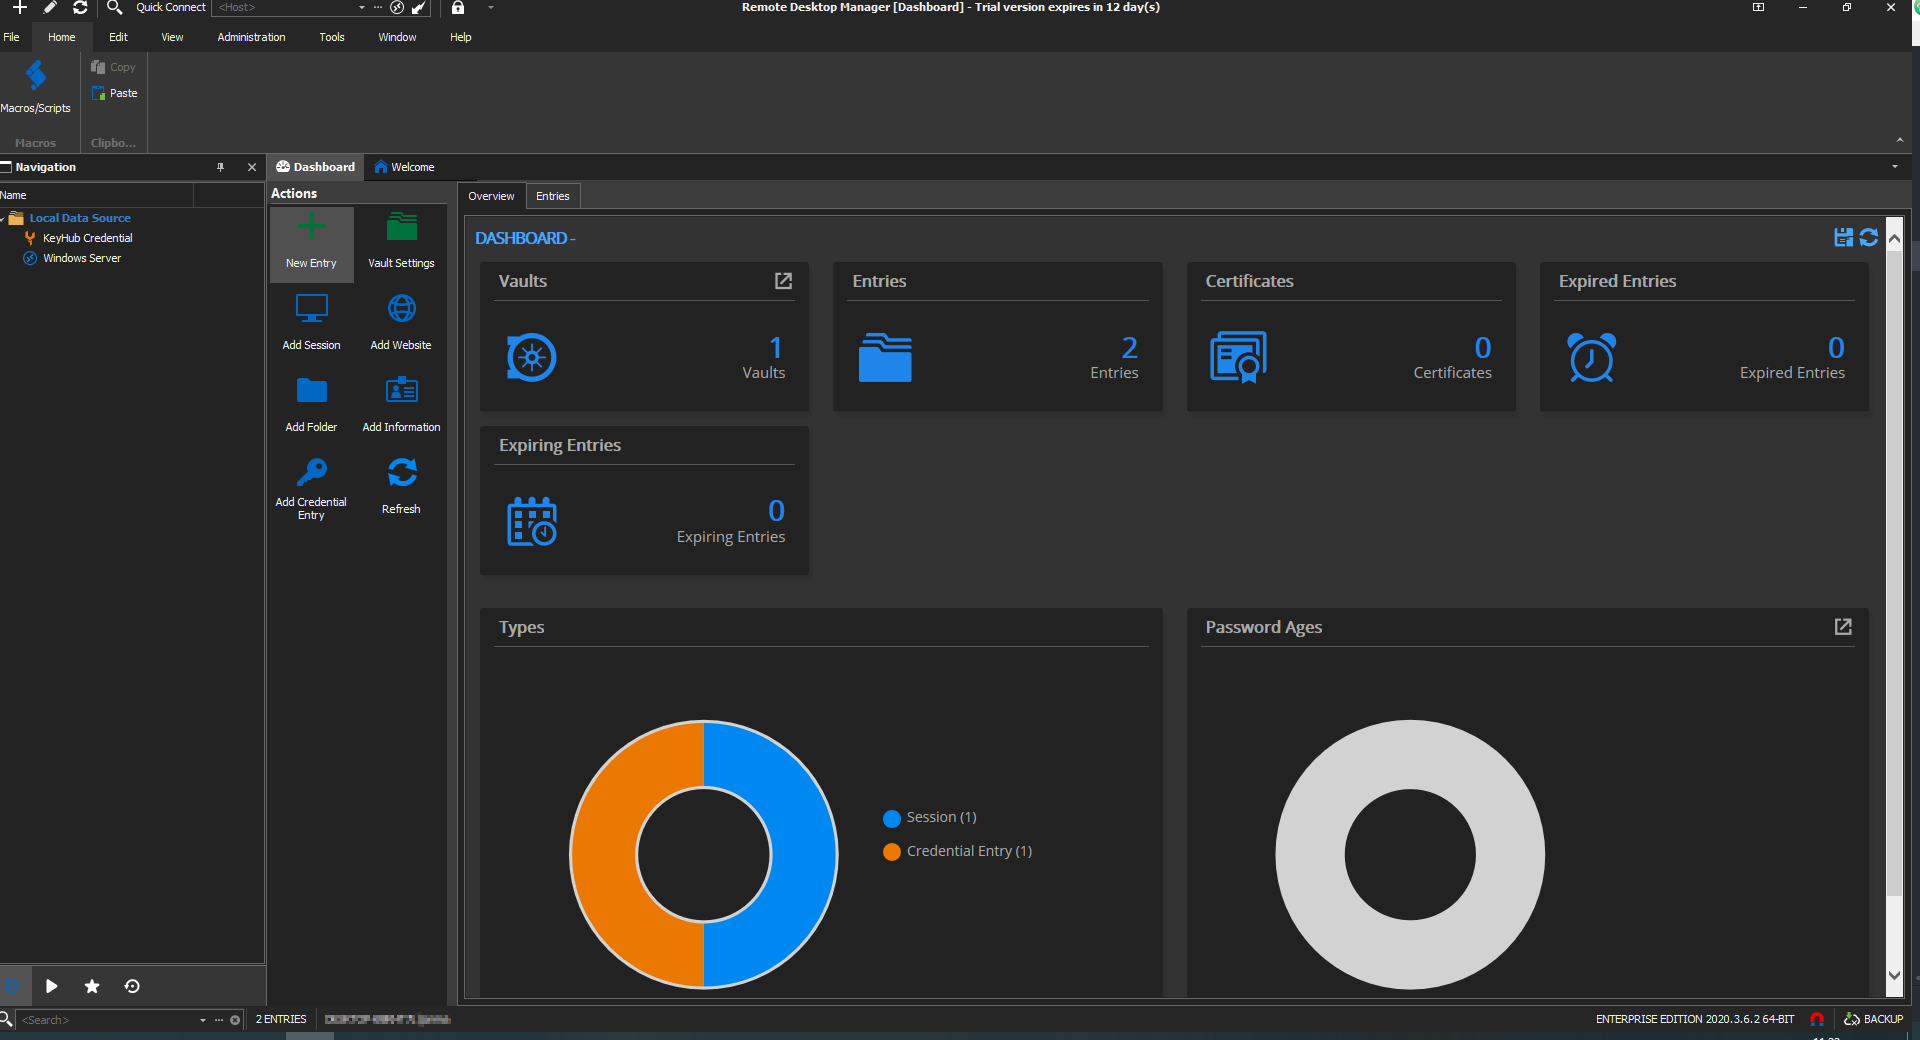
In the dashboard Tab.
-
Click New Entry.
Step 2
-
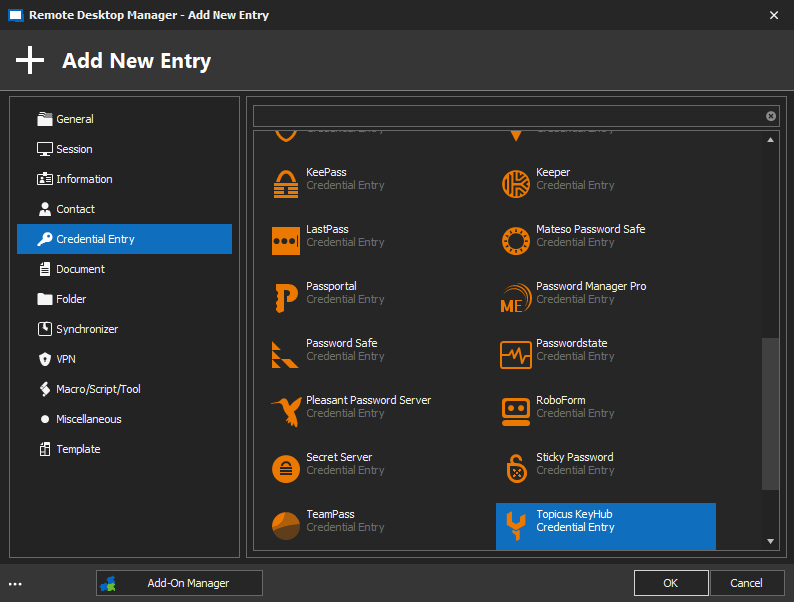
Select Credential Entry.
-
Select Topicus KeyHub Credential Entry.
-
Click OK.
Step 3
-
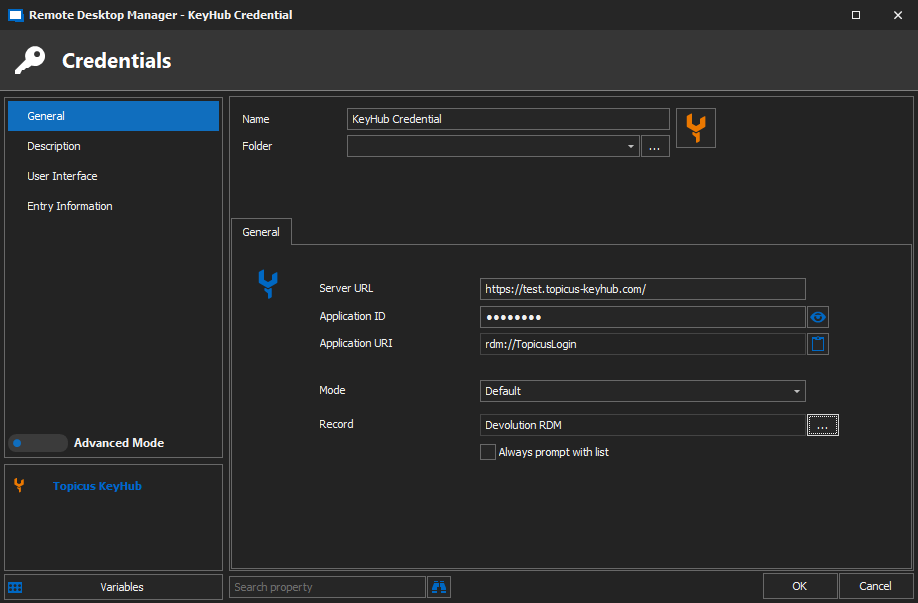
Choose a Name.
-
Fill in the Server URL.
-
Fill in the Application ID.
-
Choose a Mode.
-
Default will let you select a specific record form the vault.
-
Always prompt with list will prompt when you start an RDP session.
-
Rotating password will get your KeyHub username and rotating password.
-
-
Click OK.
| If you are not logged in to KeyHub you will be prompted to login in your browser. |
| You can copy the Application ID in KeyHub. Go to MANAGE ACCESS and select the Devolutions OIDC application you already made. The Application ID is the Client Identifier you’ll find at the bottom. |
Step 4
Test your credential.
-
In the Navigation Pane, right-click your newly made credential.
-
Select View Password.
-
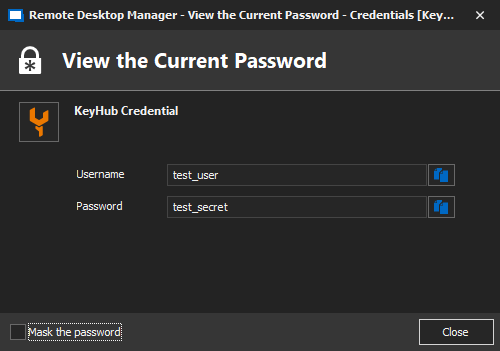
A window pops up and shows the credentials from your vault.
Step 5
-
Done. You can now use your newly made credential.