Prepare a client certificate
Step 1
-
Log in to the Active Directory with the user "keyhub" (see Prepare AD).
-
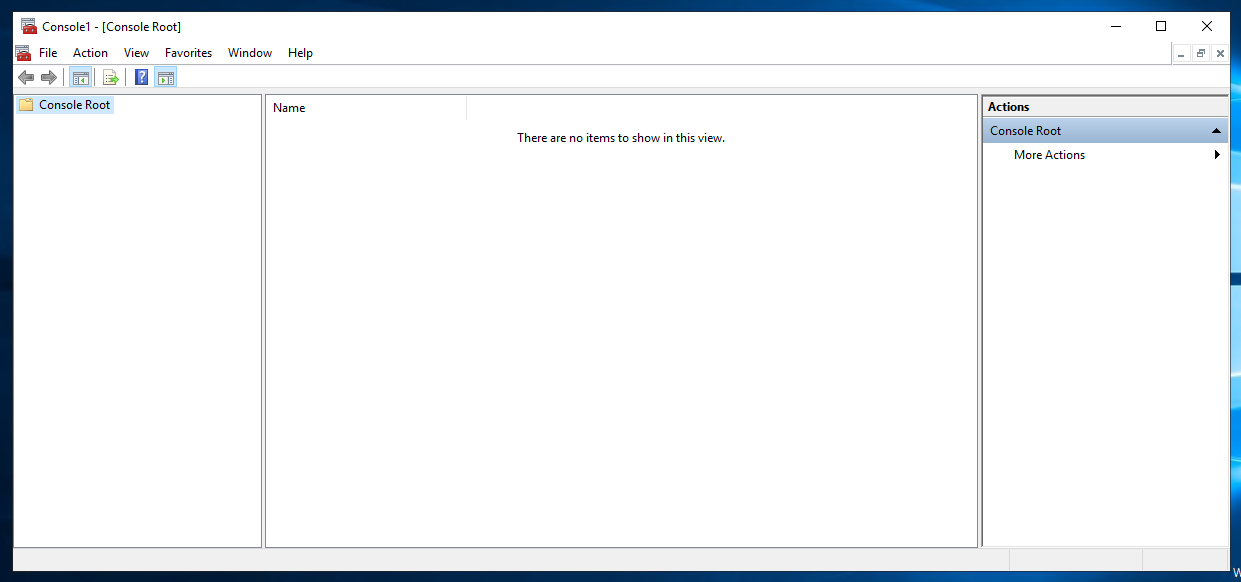
Open Microsoft Management Console (mmc.exe).
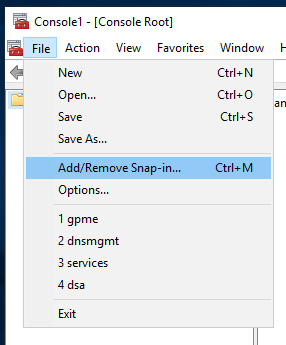
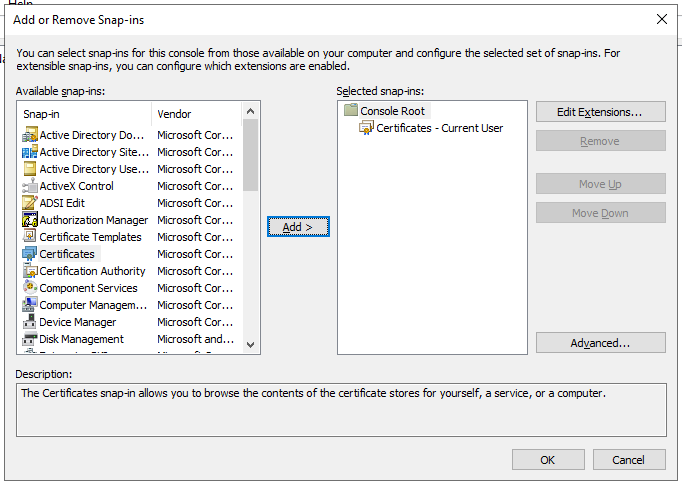
Step 2
-
Open File → Add /Remove Snap-in
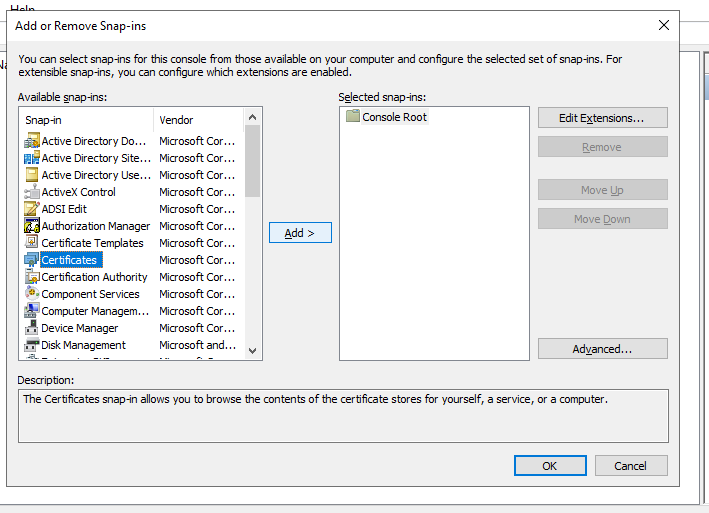
Step 3
-
Select Certificates.
-
Click Add.
-
Click OK.
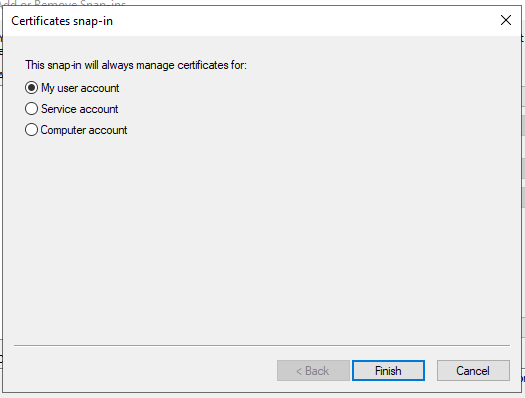
Step 4
-
Select My user account.
-
Click Finish.
-
Click OK.
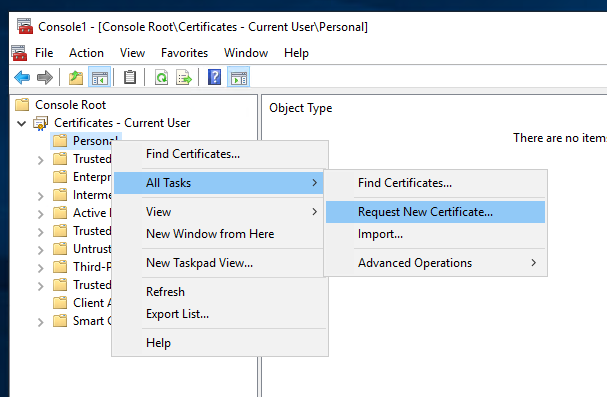
Step 5
-
Right click Personal (from Console root → Certificates - Current User).
-
Select All tasks → Request New Certificate.
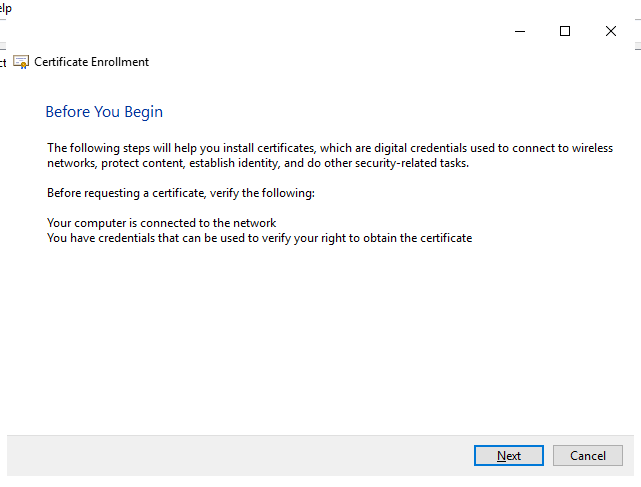
Step 6
-
Click Next.
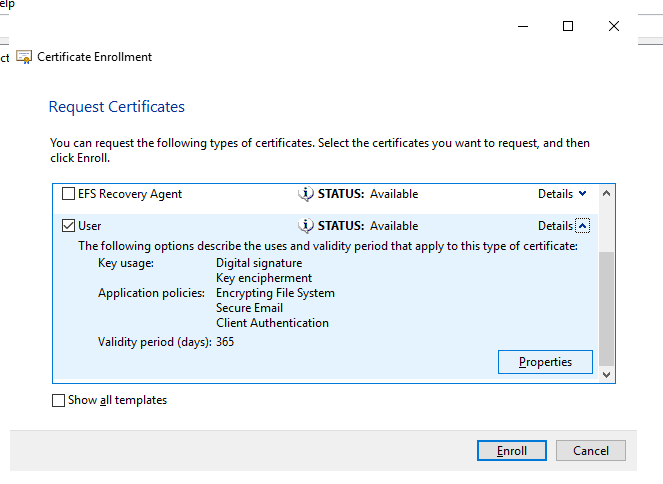
Step 7
-
Select User.
-
Expand details.
-
Click Properties.
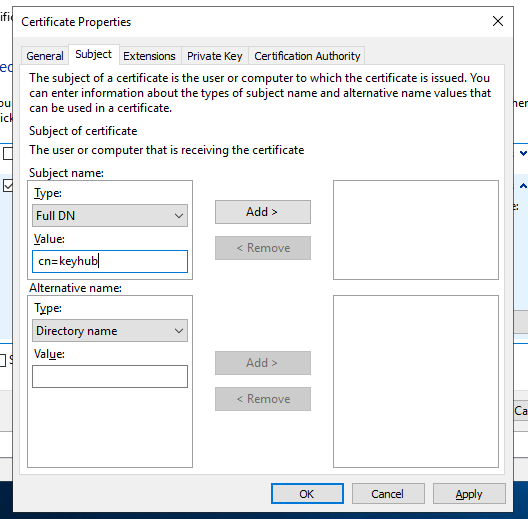
Step 8
-
Select Subject tab.
-
Fill in cn=keyhub in the Full DN Value box.
-
Click Add.
-
Click OK.

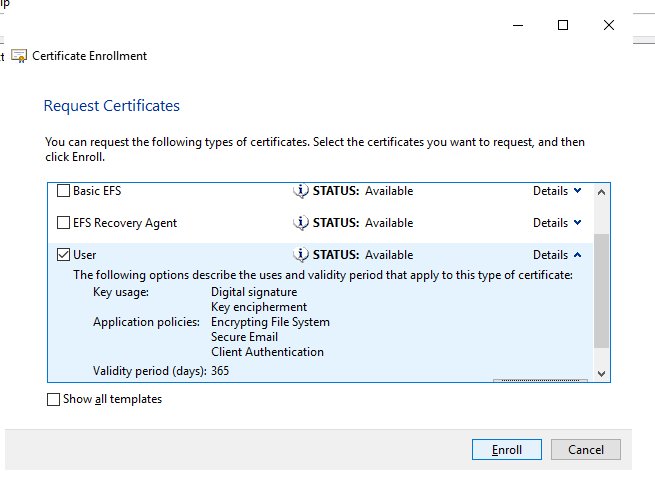
Step 9
-
Click Enroll.
Step 10
-
Done. Your client certificate is created.
Export the client certificate and key
From the management console with user certificate snap in (see step 1 through 4 here).
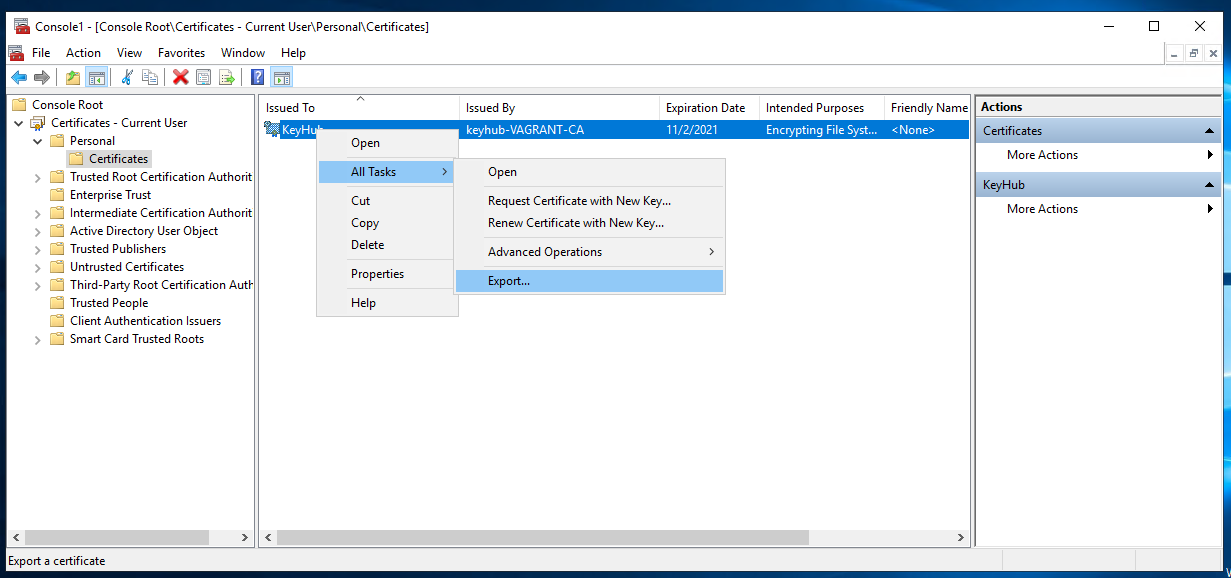
Step 1
-
Right click the certificate you want to export.
-
Select All tasks.
-
Select Export.
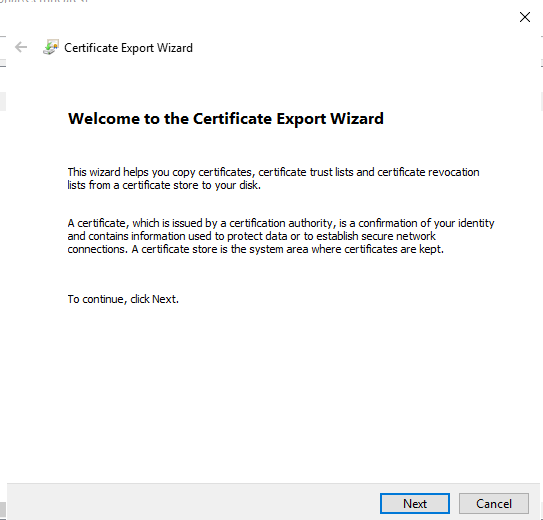
Step 2
-
Click Next.
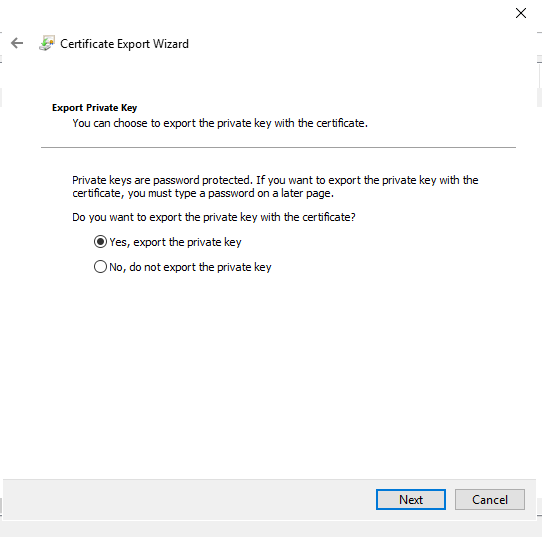
Step 3
-
Select Yes…
-
Click Next.
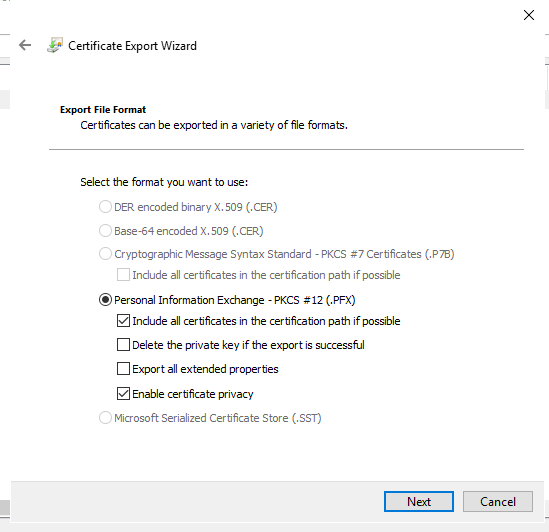
Step 4
-
Select Personal Information Exchange.
-
Click Next.
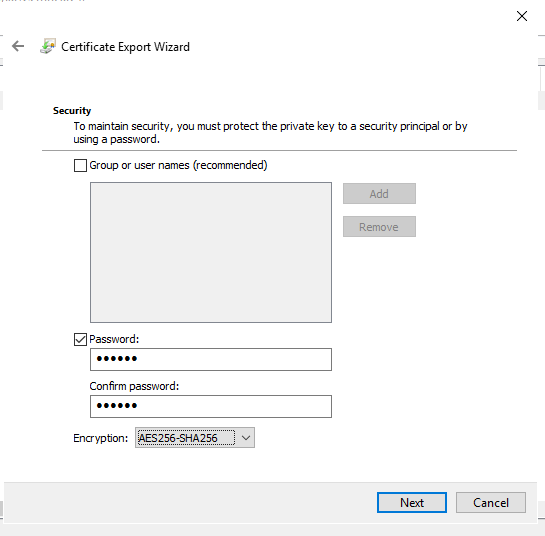
Step 5
-
Select Password.
-
Fill in your password.
-
Click Next.
Step 6
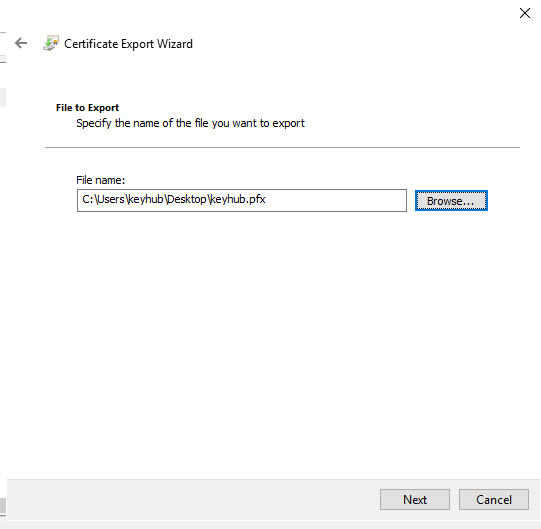
-
Specify the name and location for your exported certificate.
-
Click Next.
-
Click Finish.
-
Click OK
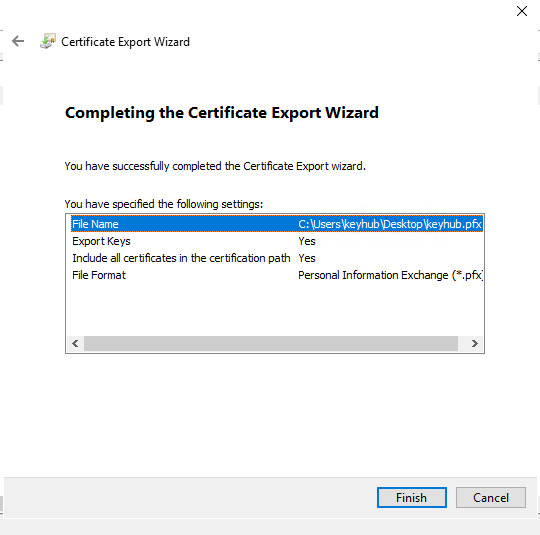
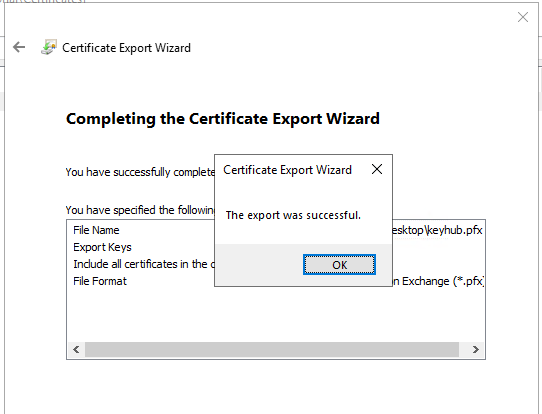
Step 7
-
Done. Your certificate and key are packed in a .pfx file.
Convert the PFX to a certificate and private key
To concert PFX to PEM you can use OpenSSL. OpenSSL is availlable for different platforms. An example for Powershell is included. If you have access to a system with OpenSSL installed you can find the commands to convert a PFX here.
-
Install chocolaty following the instructions on their website.
-
Change into the OpenSSL bin directory.
cd C:\Program Files\OpenSSL\bin
-
Run the commands as mentioned here.
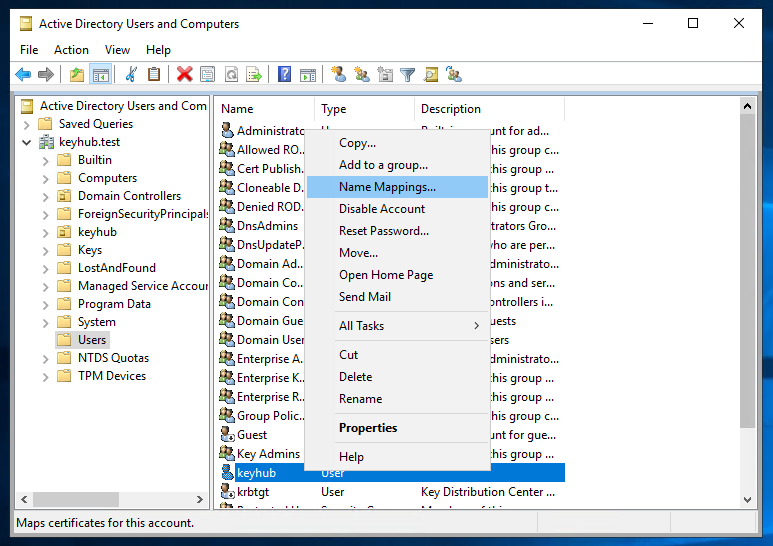
Prepare the Active Directory user
Step 1
-
Open Active Directory Users and Computers.
-
Find the user keyhub.
-
Right click and select Name Mappings.
Step 2
-
Select Add.
-
Browse to the and open the .pem certificate file.
-
Click OK.
-
Click OK.
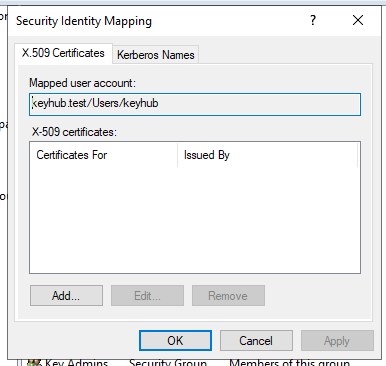
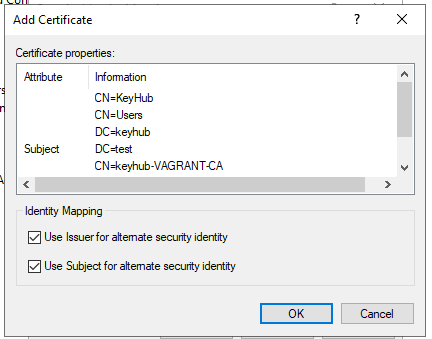
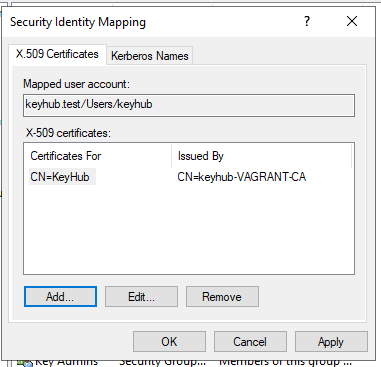
Step 3
-
Done. The user keyhub can now use a client certificate to bind.
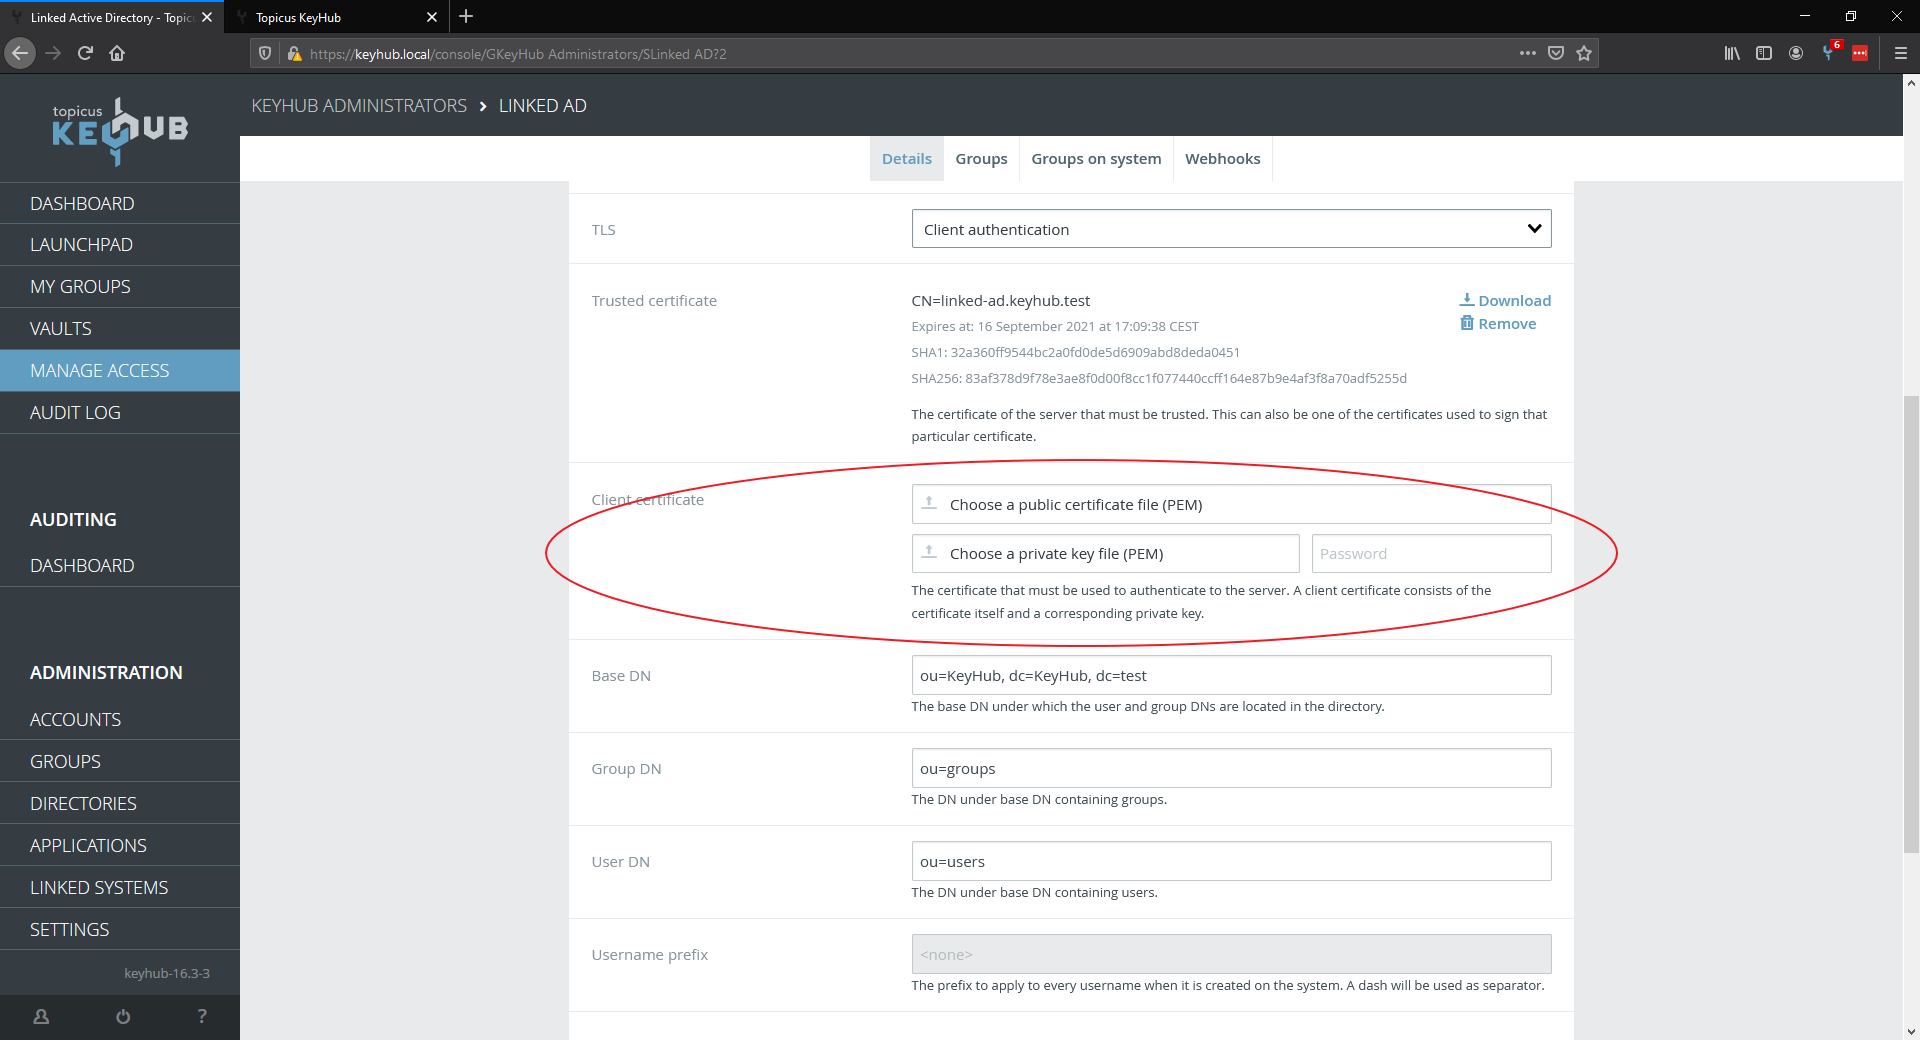
Configure KeyHub
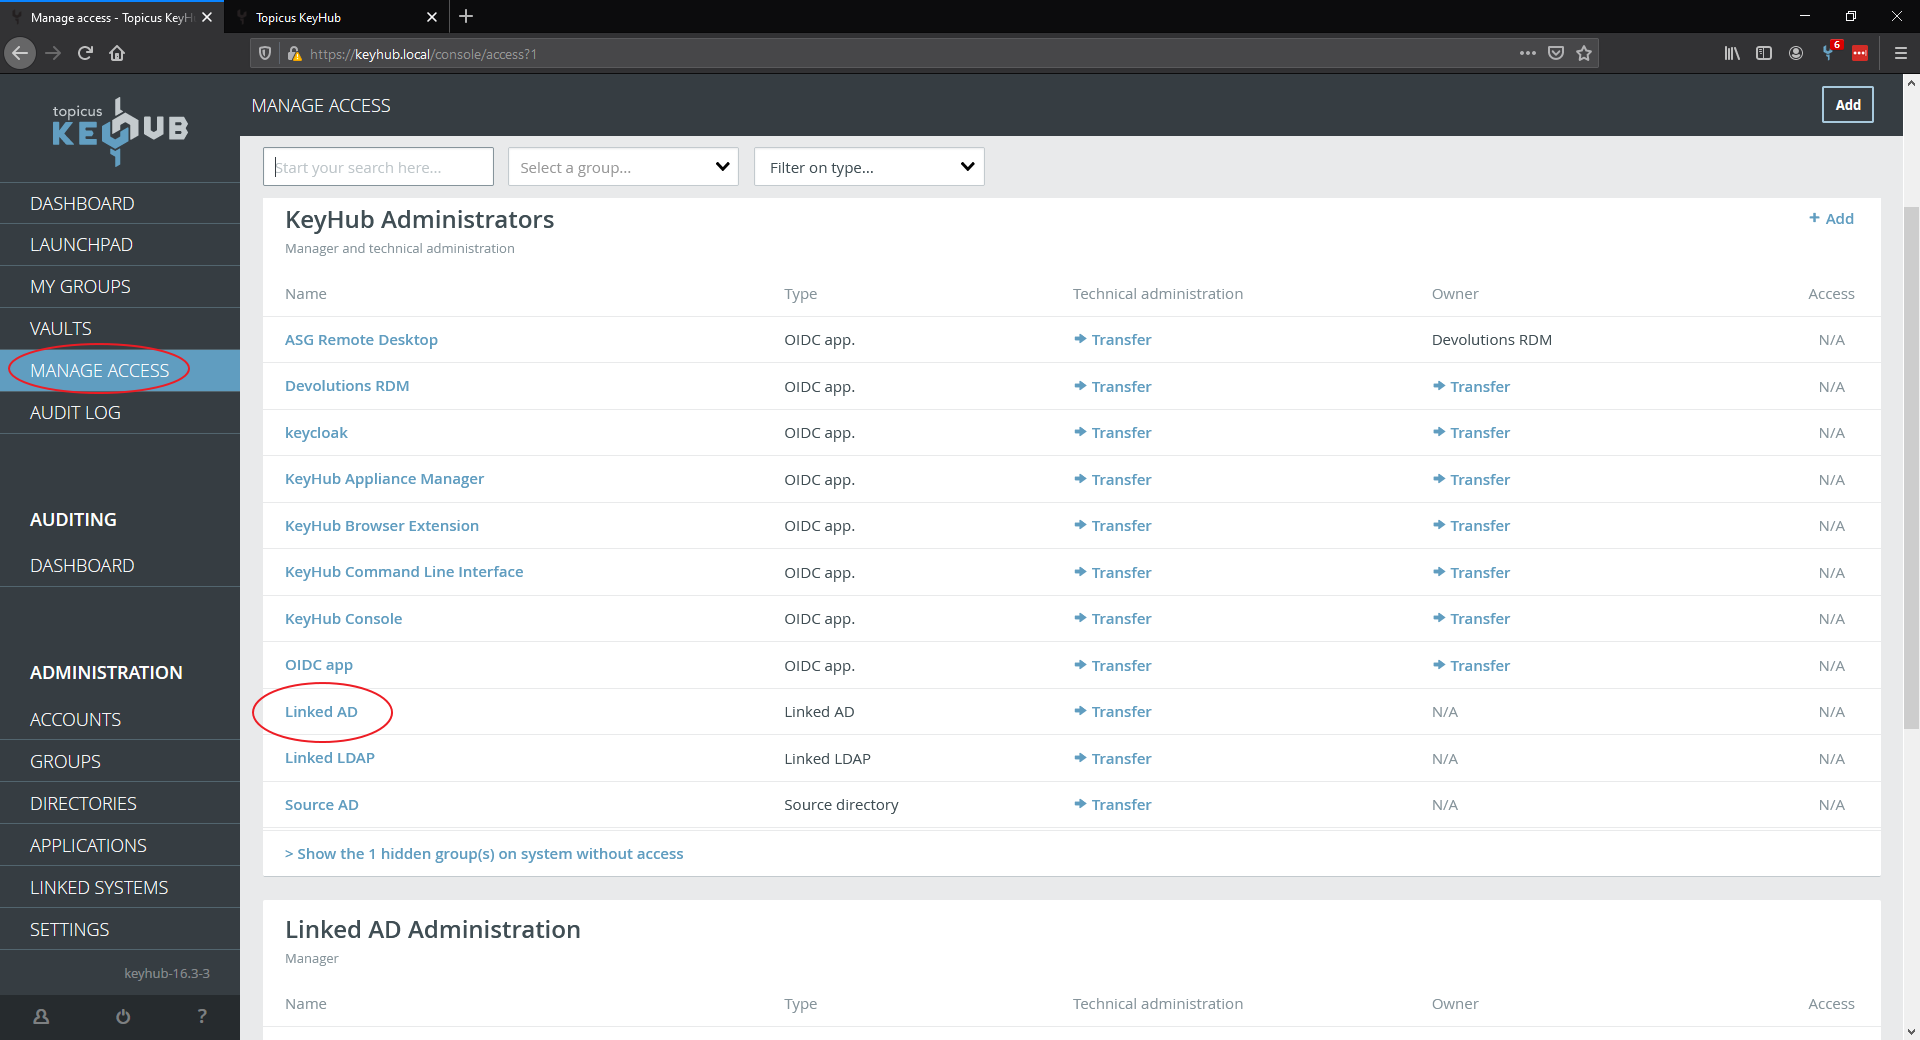
Step 1
-
From the menu select MANAGE ACCESS.
-
Find and click the Active Directory you want to configure.
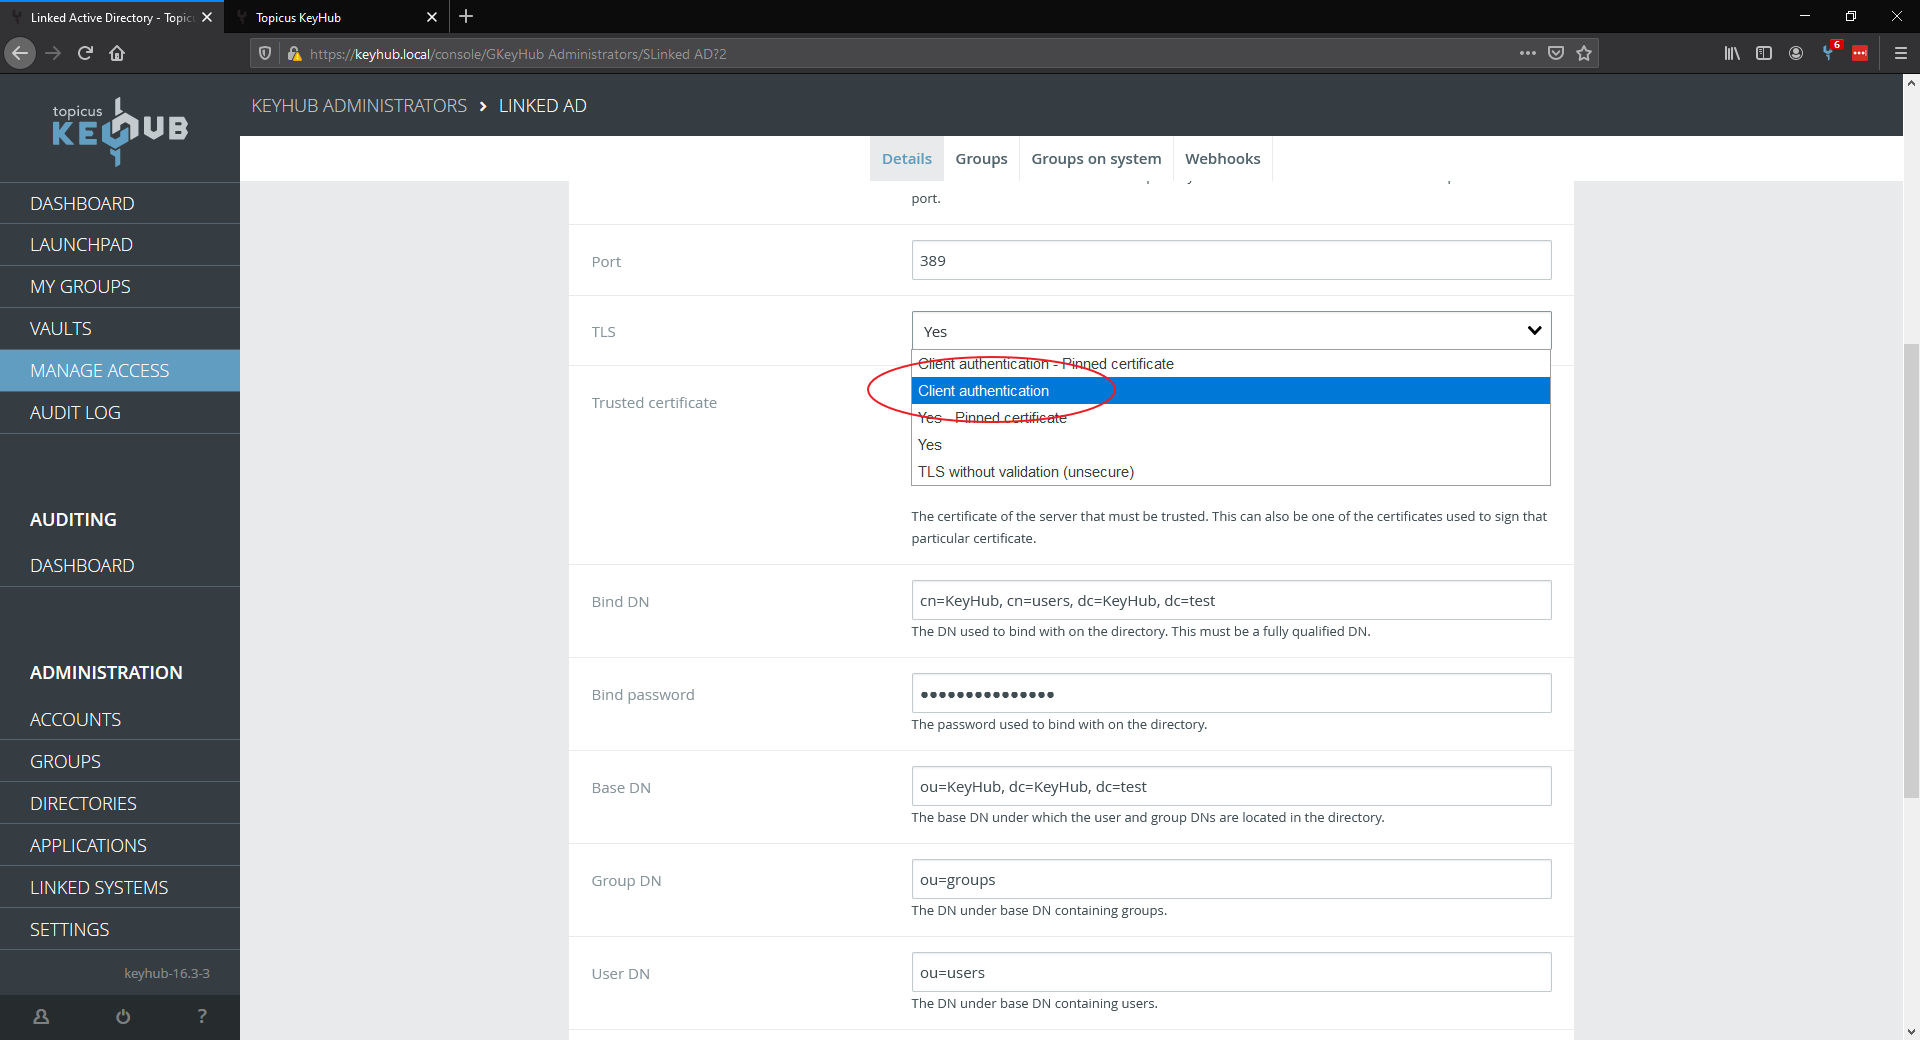
Step 2
-
From the TLS dropdown menu select Client authentication.
| If you have a pinned certificate select Client authentication - Pinnned certificate |
Step 3
-
Upload your public certificate, private key and fill in your private key password.
Step 4
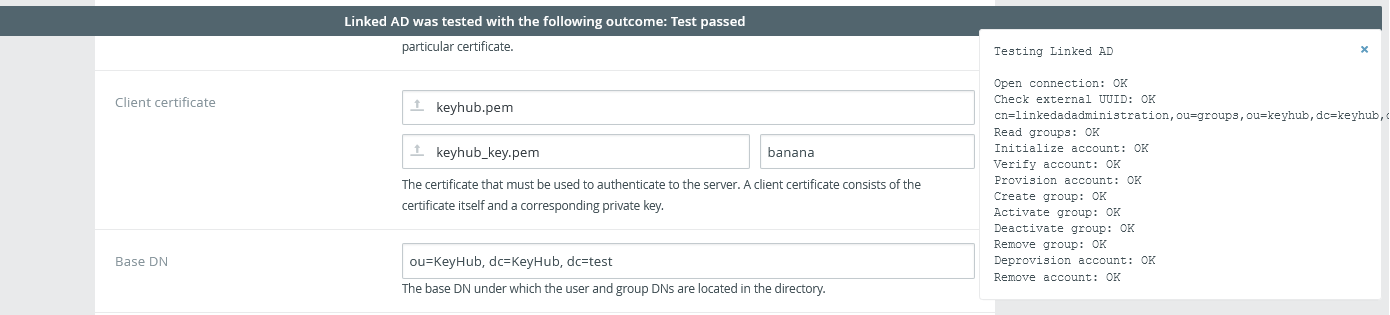
-
Click TEST.
-
Click SAVE.
Step 5
-
Done. You are now using client authentication instead of a bind with username and password.